"Direct inward system access (DISA)" service is one of useful IP-PBX services in enterprise communication markets. DISA permits outside users loging into PBX and using PBX service just like the system extensions. When outside users dial into PBX, they will interact with IVR prompt and input some authorization information. Once they pass authorization, they can use PBX service, such as dial local users, make out-group calls, etc.
1.1 Authorization
When outside users dial in the system, there are two kinds of authorization:
- Caller ID authorization
- IVR interaction authorization
If the caller ID is configured in the DISA configuration, the system will authorize the incoming calls directly. In this scenario, it is unnecessary for the outside user to input DISA information.
In another scenario, once the outside users access into the system, the system will prompt the users to input DISA information for authorization. When DISA information can pass authorization, the system will prompt to input final destination number and route the call to such destination.
miniSIPServer V2.10 (build 20100921) or above can support DISA service.
2.1 Access into DISA
miniSIPServer DISA service can be nested in the auto-attendant service, so there are two ways to access into DISA:
One is to be triggerred in the auto-attendant service. When the incoming call is routed to AA service, AA will prompt to input extension number. By default, if the calling party input "11" or "11#", miniSIPServer AA service will trigger DISA service.
Another is used DID or SIP trunk to trigger DISA. The default access code of DISA is "*80*". If the called number of incoming call from SIP trunk is "*80*", miniSIPServer will trigger DISA directly. In the DID service, the outside user (calling party) can dial "*80*" directly to trigger DISA service. If the calling party can pass "caller-id authorization", he/she can also dial DISA access code followed with the final destination number. For example, the calling party can dial "*80*5678" directly, then miniSIPServer will check the DISA caller-id authorization and route the call to destination "5678".
2.2 Authorization
miniSIPServer support both above authorizations described in section 1.1. Once the incoming call is accepted, no matter it is from DID, trunk or auto-attendant, miniSIPServer will always check the caller-id authorization firstly.
If the caller ID is in the "caller-id authorization" configuration, miniSIPServer will bind the outside user to a local user and prompt to input final destination number, or get final destination number from the incoming called number if the call is from trunk or DID.
If the caller ID is not in the "caller-id authorization" configuration, miniSIPServer will prompt the outside user to input DISA account and password for authorization.
2.3 Process DISA call
In miniSIPServer, each DISA account is binded to one local user (extension). Once the outside users pass the DISA authorization,it will be treated as the binded local user to make the final call. The outside user can use some features of such local user. That means the called party will see the binded "local user" as calling party.
As described in previous sections, following items need to be configured: caller-id authorization, DISA account and DISA password.
In another way, miniSIPServer stores these configurations in MySQL database. So it is also necessary to configure miniSIPServer to work with MySQL database.
3.1 Configure system information
Please install MySQL database firstly. Once MySQL is ready, we can configure miniSIPServer to work with MySQL.
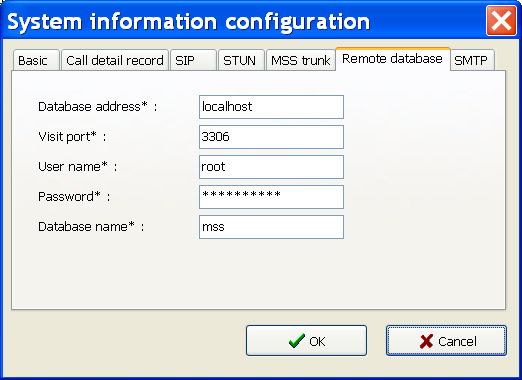
In miniSIPServer, please click menu "Data / System / Remote database". In the pop-up dialog, please fill your MySQL database information there. Then, please restart miniSIPServer to enable it.

Once miniSIPServer works well with MySQL, miniSIPServer will create tables in MySQL automatically when miniSIPServer is start-up. Then, we can continue our configurations.
3.2 DISA account
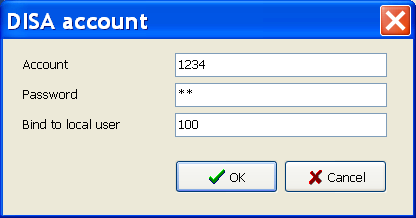
Please click menu "services --> Direct inward system access --> DISA account" to add/modify/delete a record. One DISA account information includes: account number, password and the local user which will be binded to.

3.3 DISA caller ID authorization
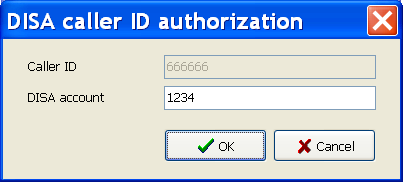
As we have described above, miniSIPServer DISA can authorize outside caller directly. In this section, we can configure the relationship between DISA account and caller ID.
Please click menu "services --> Direct inward system access --> DISA caller-id authorization" to do that.
