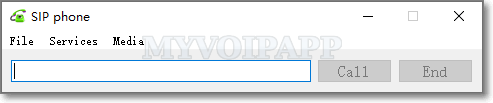
miniSIPPhone should be configured to connect to a SIP server (for example, miniSIPServer). Please click menu "File - SIP account" or press "F5" key directly to show the configuration window.
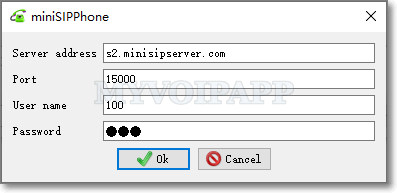
| Server address | The SIP server address. It can be an IP address or a domain name. If servers use standard SIP ports, it is unnecessary to indicate ports independently. But if the servers require different SIP ports, we need to configure them with the server address, for example: 15000.s2.minisipserver.com:6060 |
| Transport | SIP can be transported over (1) UDP, (2) TCP, and (3) TLS. If SIP transport is TLS, miniSIPPhone will use SRTP to transmit audio streams by default. |
| User name | The user name for authorization. |
| Password | The password for authorization. |
We can save user's number and the display name into the 'Contact'. When receive an incoming call, miniSIPPhone will show the display name according to the contact records.
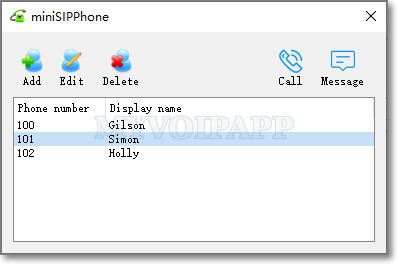
In this window, we can select a record, then
double click the record, or click button 'Call', or press 'C' key to make a call to such user.
click button 'Message' or press 'M' key to send instant messages to the user.
miniSIPServer uses an independent window for each user. Each window has three areas:
Messages area. It displays both incoming messages and outgoing messages.
Input area. You can input the instant message content here, and press "Ctrl+Enter" keys to send the message out.
"Send" button. Click it to send the message out.
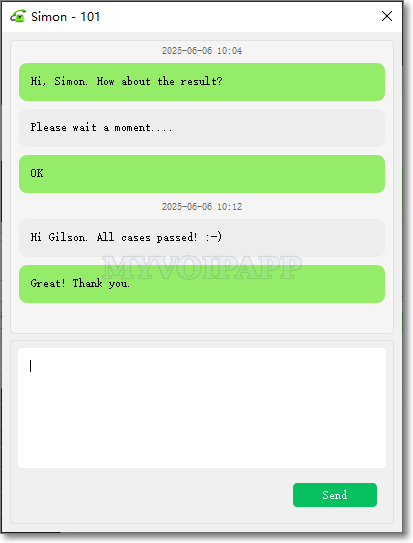
The instant messages are based on standard SIP-MESSAGE method, that means you can send/receive instant messages to/from other SIP servers/phones/clients, such as MicroSIP or Linphone, and so on.
At this time, miniSIPPhone can only support plain text messages, so you cannot insert images, files, videos or audios into the instant messages.